Charmglow Stainless Steel User Manual
Browse online or download User Manual for Barbecues & grills Charmglow Stainless Steel. ROTISSERIE ASADOR ESTILO ROTISSERIE [en]
- Page / 16
- Table of contents
- BOOKMARKS
- ROTISSERIE 1
- ASADOR ESTILO ROTISSERIE 1
- WARNINGS 2
- ASSEMBLY INSTRUCTIONS 3
- ASSEMBLY STEPS 4
- OPERATING THE ROTISSERIE: 6
- OWNERS MANUAL TO THE GRILL 6
- ADVERTENCIAS 8
- INSTRUCCIONES DE ARMADO 9
- PASOS DE ARMADO 10
- 810-7440-S 11
- 810-7600-S 11
- ADVERTENCIA 12
- 800-535-4555 13
- 1-YEAR LIMITED WARRANTY 16
- 1 AÑO DE GARANTÍA LIMITADA 16
Summary of Contents
WARNINGREAD AND FOLLOW ALLWARNINGS AND INSTRUCTIONS INTHIS MANUAL TO AVOID PERSONALINJURY, INCLUDING DEATH ORPROPERTY DAMAGE.ADVERTENCIALEA Y SIGA TOD
PASOS DE ARMADOPaso 1Abra la cubierta de la parrillay quite las rejillas paracocinar. Consulte su manualdel propietario deCharmglow®.Paso 2Instale el
Hueco para collaríndeslizante10Paso 4Afloje el tornillo y elresbaladero fijo acanaló el finde cuello en la varilla.Paso 5Alinee la ranura del cuelloco
11ADVERTENCIAINSTRUCCIONES PARA CONECTAR A TIERRA LOS ARTEFACTOSELÉCTRICOS:Este artefacto (motor del asador estilo rotisserie) está equipado con un en
12COCINAR A LA PARRILLA A LA TEMPERATURA APROPIADA:• Utilice un termómetro para carne para verificar que haya alcanzado unatemperatura interna segura.
140-7440-R7/06, 9/06, 12/06©2006 The Brinkmann CorporationDallas, Texas 75244 U.S.Awww.brinkmann.netFOR GRILL REPLACEMENT PARTS, COVERS & ACCESSOR
WE WANT YOU TO ASSEMBLE AND USE YOUR ROTISSERIE AS SAFELY AS POSSIBLE. THE PURPOSE OF THIS SAFETY ALERT SYMBOL IS TO ATTRACT YOUR ATTENTION TO POSSIBL
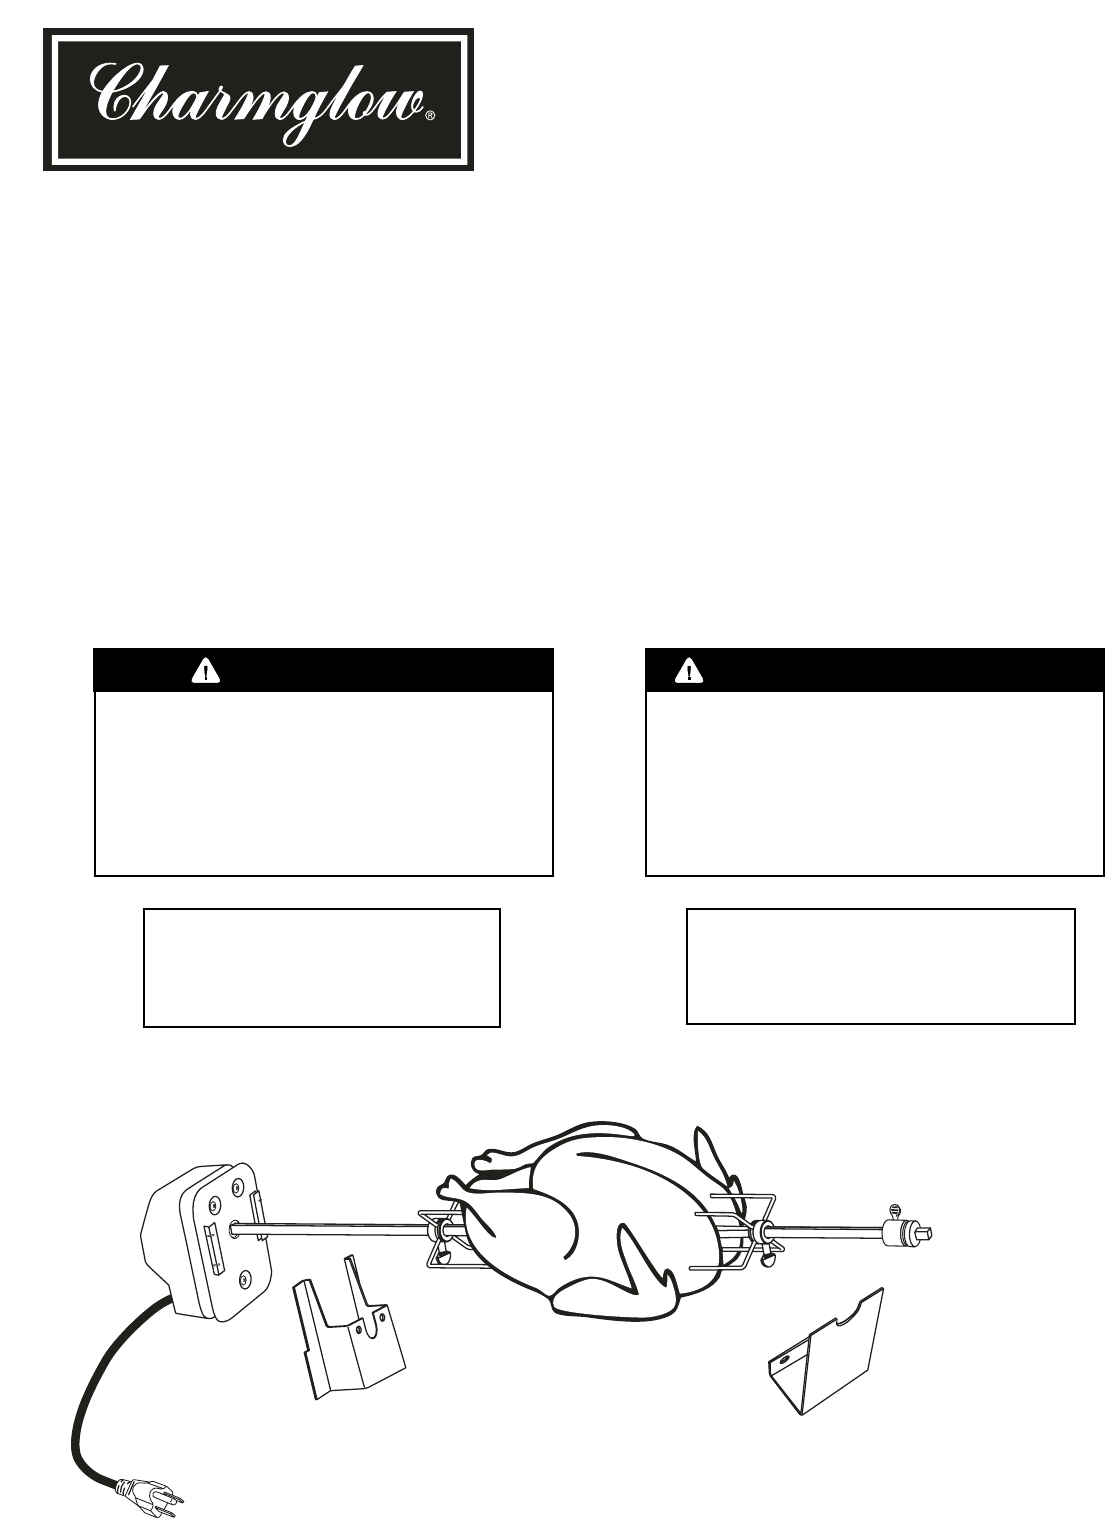
4 Screws4 Nuts1 Right Support Bracket1 Sliding CollarPARTS LIST:1 Motor1 Spit Rod2 Forks1 Motor Mount Bracket12345678ASSEMBLY INSTRUCTIONSREAD ALL SAF
ASSEMBLY STEPSStep 1Open grill hood and removecooking grills. Refer to yourCharmglow®owner’s manual.Step 2Attach the motor mountbracket on the left ha
Sliding CollarGrooveStep 4Loosen set screw and slidegrooved end of collar ontothe spit rod.Step 5Align collar groove with rightside bracket as illustr
5WARNINGELECTRICAL GROUNDING INSTRUCTIONS:This appliance (rotisserie motor) is equipped with a three-prong (grounding) plug foryour protection against
6GRILLING TO PROPER TEMPERATURE:• Use a meat thermometer to be sure food has reached a safe internal temperature. • The US Department of Agriculture r
ES NUESTRO DESEO QUE ARME Y UTILICE SU ASADOR ESTILO ROTISSERIE EN LAFORMA MÁS SEGURA POSIBLE. EL PROPÓSITO DE ESTE SÍMBOLO DE ALERTA DE SEGURIDAD ES
4 Tornillos4 Tuercas1 Soporte de la varilla1 Collarín DeslizanteLISTA DE PARTES:1 Motor1 Varilla2 Trinches1 Soporte de montaje del motor12345678INSTRU
More documents for Barbecues & grills Charmglow Stainless Steel


Related products and manuals for Barbecues & grills Charmglow Stainless Steel
 (32 pages)
 (52 pages)
 (52 pages)
© 2020, manymanuals.com. All rights reserved. | 0.311 s |
 Manymanuals.com
 Manymanuals.de
 Manymanuals.fr
 Manymanuals.it
 Manymanuals.pl
 Manymanuals.cz
 Manymanuals.es
 Manymanuals-pt.com
Comments to this Manuals